Store 组件
上面我们安装了 Thanos 的 Sidecar 和 Querier 组件,已经可以做到 Prometheus 的高可用,通过 Querier 提供一个统一的入口来查询监控数据,而且还可以对监控数据自动去重,但是还有一个非常重要的地方是还没有配置对象存储,如果想要查看历史监控数据就不行了,这个时候我们就需要去配置 Thanos Store 组件,将历史监控指标存储在对象存储中去。
目前 Thanos 支持的对象存储有:
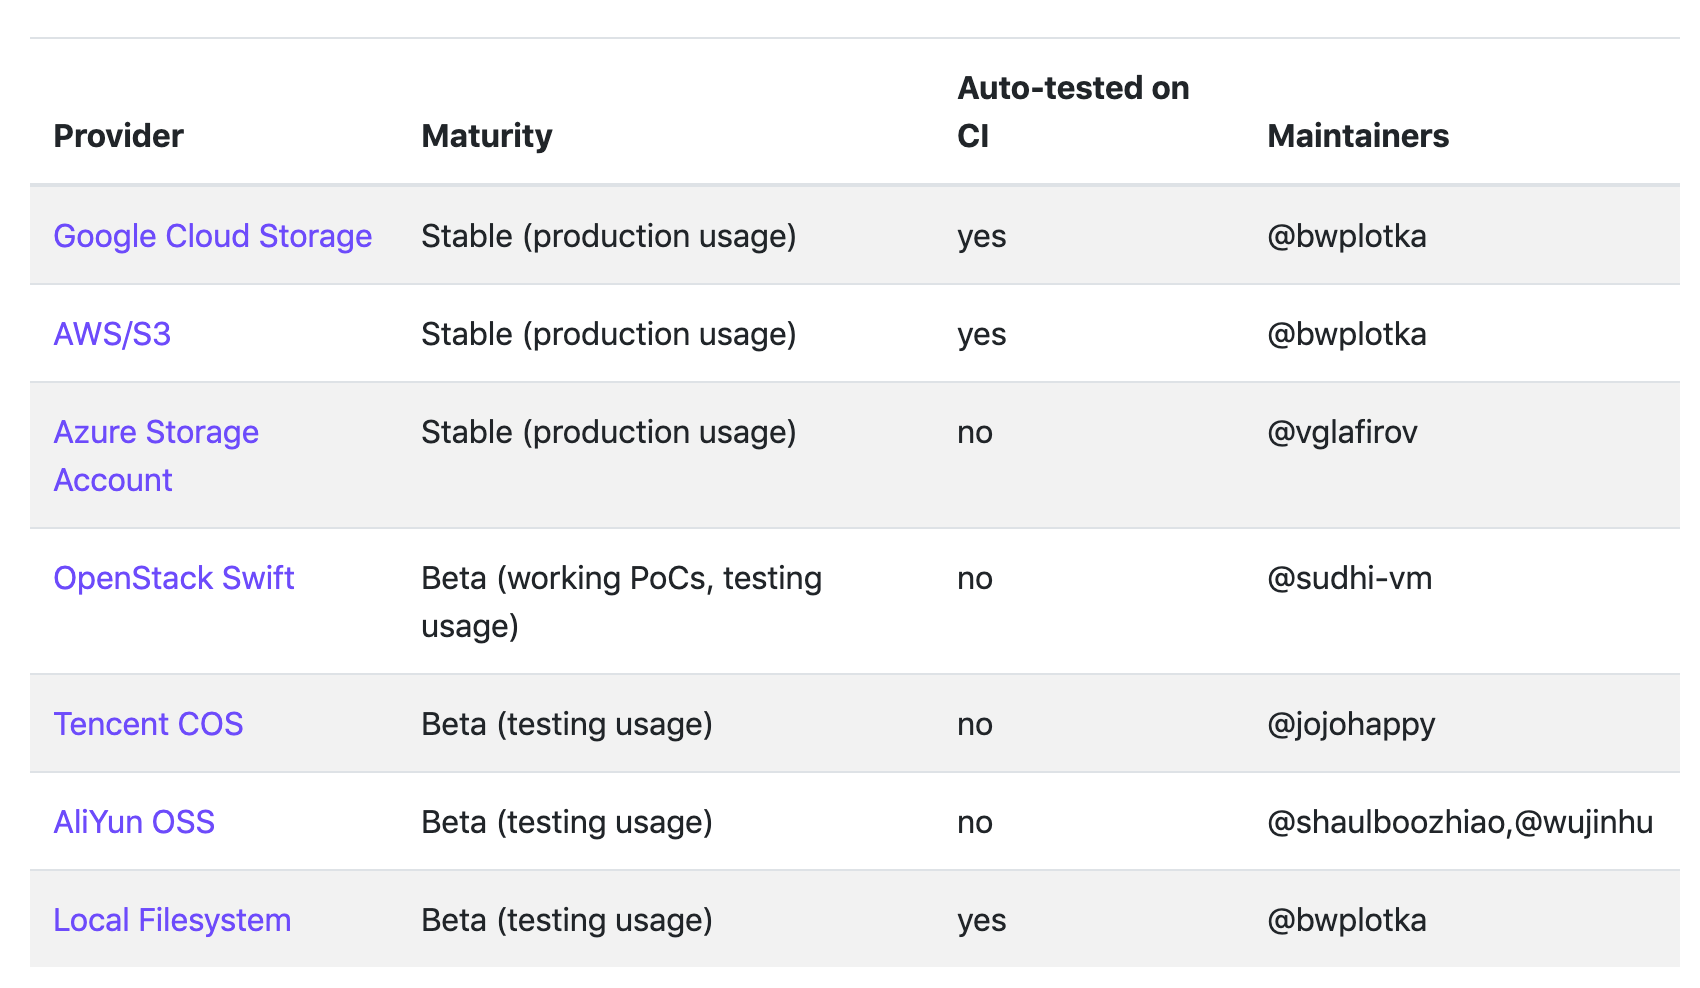
要在生产环境使用最好使用 Stable 状态的,比如 S3 或者兼容 S3 的服务,比如 Ceph、Minio 等等。
对于国内用户当然最方便的还是直接使用阿里云 OSS 或者腾讯云 COS 这样的服务,但是很多时候可能我们的服务并不是跑在公有云上面的,所以这里我们用 Minio 来部署一个兼容 S3 协议的对象存储服务。
安装 Minio
MinIO 是一个基于 Apache License v2.0 开源协议的高性能分布式对象存储服务,为大规模私有云基础设施而设计。它兼容亚马逊 S3 云存储服务接口,非常适合于存储大容量非结构化的数据,例如图片、视频、日志文件、备份数据和容器/虚拟机镜像等,而一个对象文件可以是任意大小,从几 kb 到最大 5T 不等。
要安装 Minio 非常容易的,同样我们这里将 Minio 安装到 Kubernetes 集群中,可以直接参考官方文档 使用 Kubernetes 部署 MinIO,在 Kubernetes 集群下面可以部署独立、分布式或共享几种模式,可以根据实际情况部署,我们这里只是单纯测试用最简单的独立模式即可。
直接使用如下所示的 Deployment 来管理 Minio 的服务:
# minio-deploy.yaml
apiVersion: apps/v1
kind: Deployment
metadata:
  name: minio
spec:
  selector:
    matchLabels:
      app: minio
  strategy:
    type: Recreate
  template:
    metadata:
      labels:
        app: minio
    spec:
      volumes:
        - name: data
          persistentVolumeClaim:
            claimName: minio-pvc
      containers:
        - name: minio
          volumeMounts:
            - name: data
              mountPath: '/data'
          image: minio/minio:latest
          args: ['server', '--console-address', ':9001', '/data']
          env:
            - name: MINIO_ACCESS_KEY
              value: 'minio'
            - name: MINIO_SECRET_KEY
              value: 'minio123'
          ports:
            - containerPort: 9000
            - containerPort: 9001
          readinessProbe:
            httpGet:
              path: /minio/health/ready
              port: 9000
            initialDelaySeconds: 10
            periodSeconds: 10
          livenessProbe:
            httpGet:
              path: /minio/health/live
              port: 9000
            initialDelaySeconds: 10
            periodSeconds: 10
由于新版本的镜像区分了 Console 和 API 两个服务的端口,所以在启动的时候我们需要通过 --console-address 参数来指定 Console 服务的端口,默认的 API 服务在 9000 端口上。
然后通过一个名为 minio-pvc 的 PVC 对象将数据持久化:
# minio-pvc.yaml
apiVersion: v1
kind: PersistentVolumeClaim
metadata:
  name: minio-pvc
spec:
  accessModes:
    - ReadWriteOnce
  resources:
    requests:
      storage: 10G
  storageClassName: longhorn # 最好使用LocalPV
最后我们可以通过 NodePort 类型的 Service 服务将 Minio 暴露给外部用户使用:
# minio-svc.yaml
apiVersion: v1
kind: Service
metadata:
  name: minio
spec:
  ports:
    - name: console
      port: 9001
      targetPort: 9001
      nodePort: 30091
    - name: api
      port: 9000
      targetPort: 9000
  selector:
    app: minio
  type: NodePort
直接创建上面的资源对象即可:
☸ ➜ kubectl apply -f https://p8s.io/docs/thanos/manifests/minio.yaml
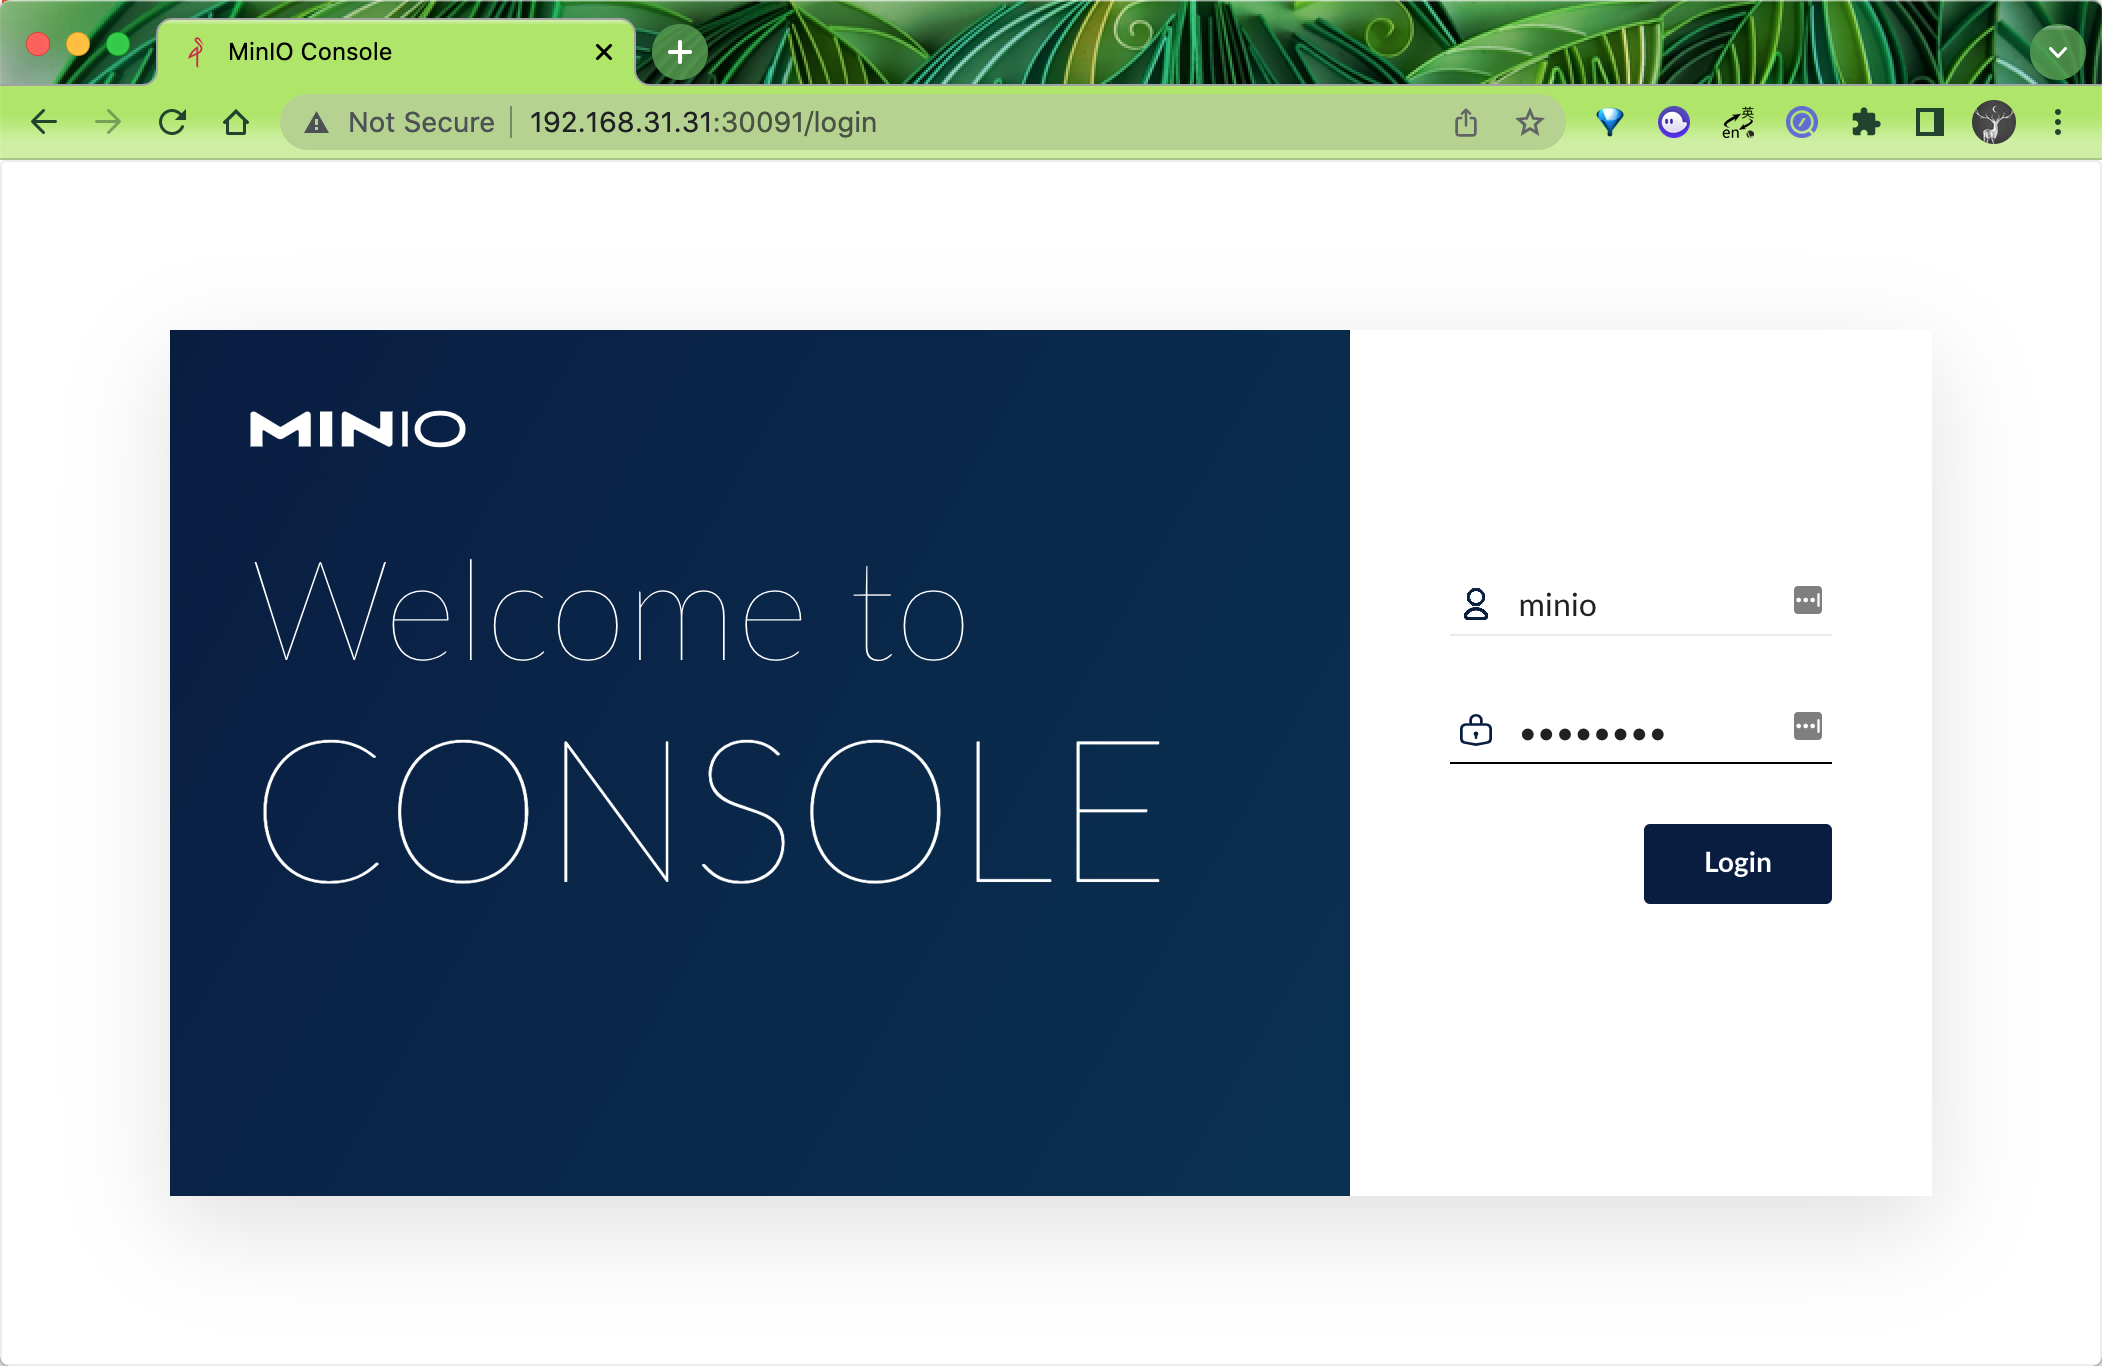
部署成功后,可以在浏览器中访问 http://<nodeip>:30091 访问到 MinIO Console 服务,通过上面定义的 MINIO_ACCESS_KEY 和 MINIO_SECRET_KEY 即可登录:
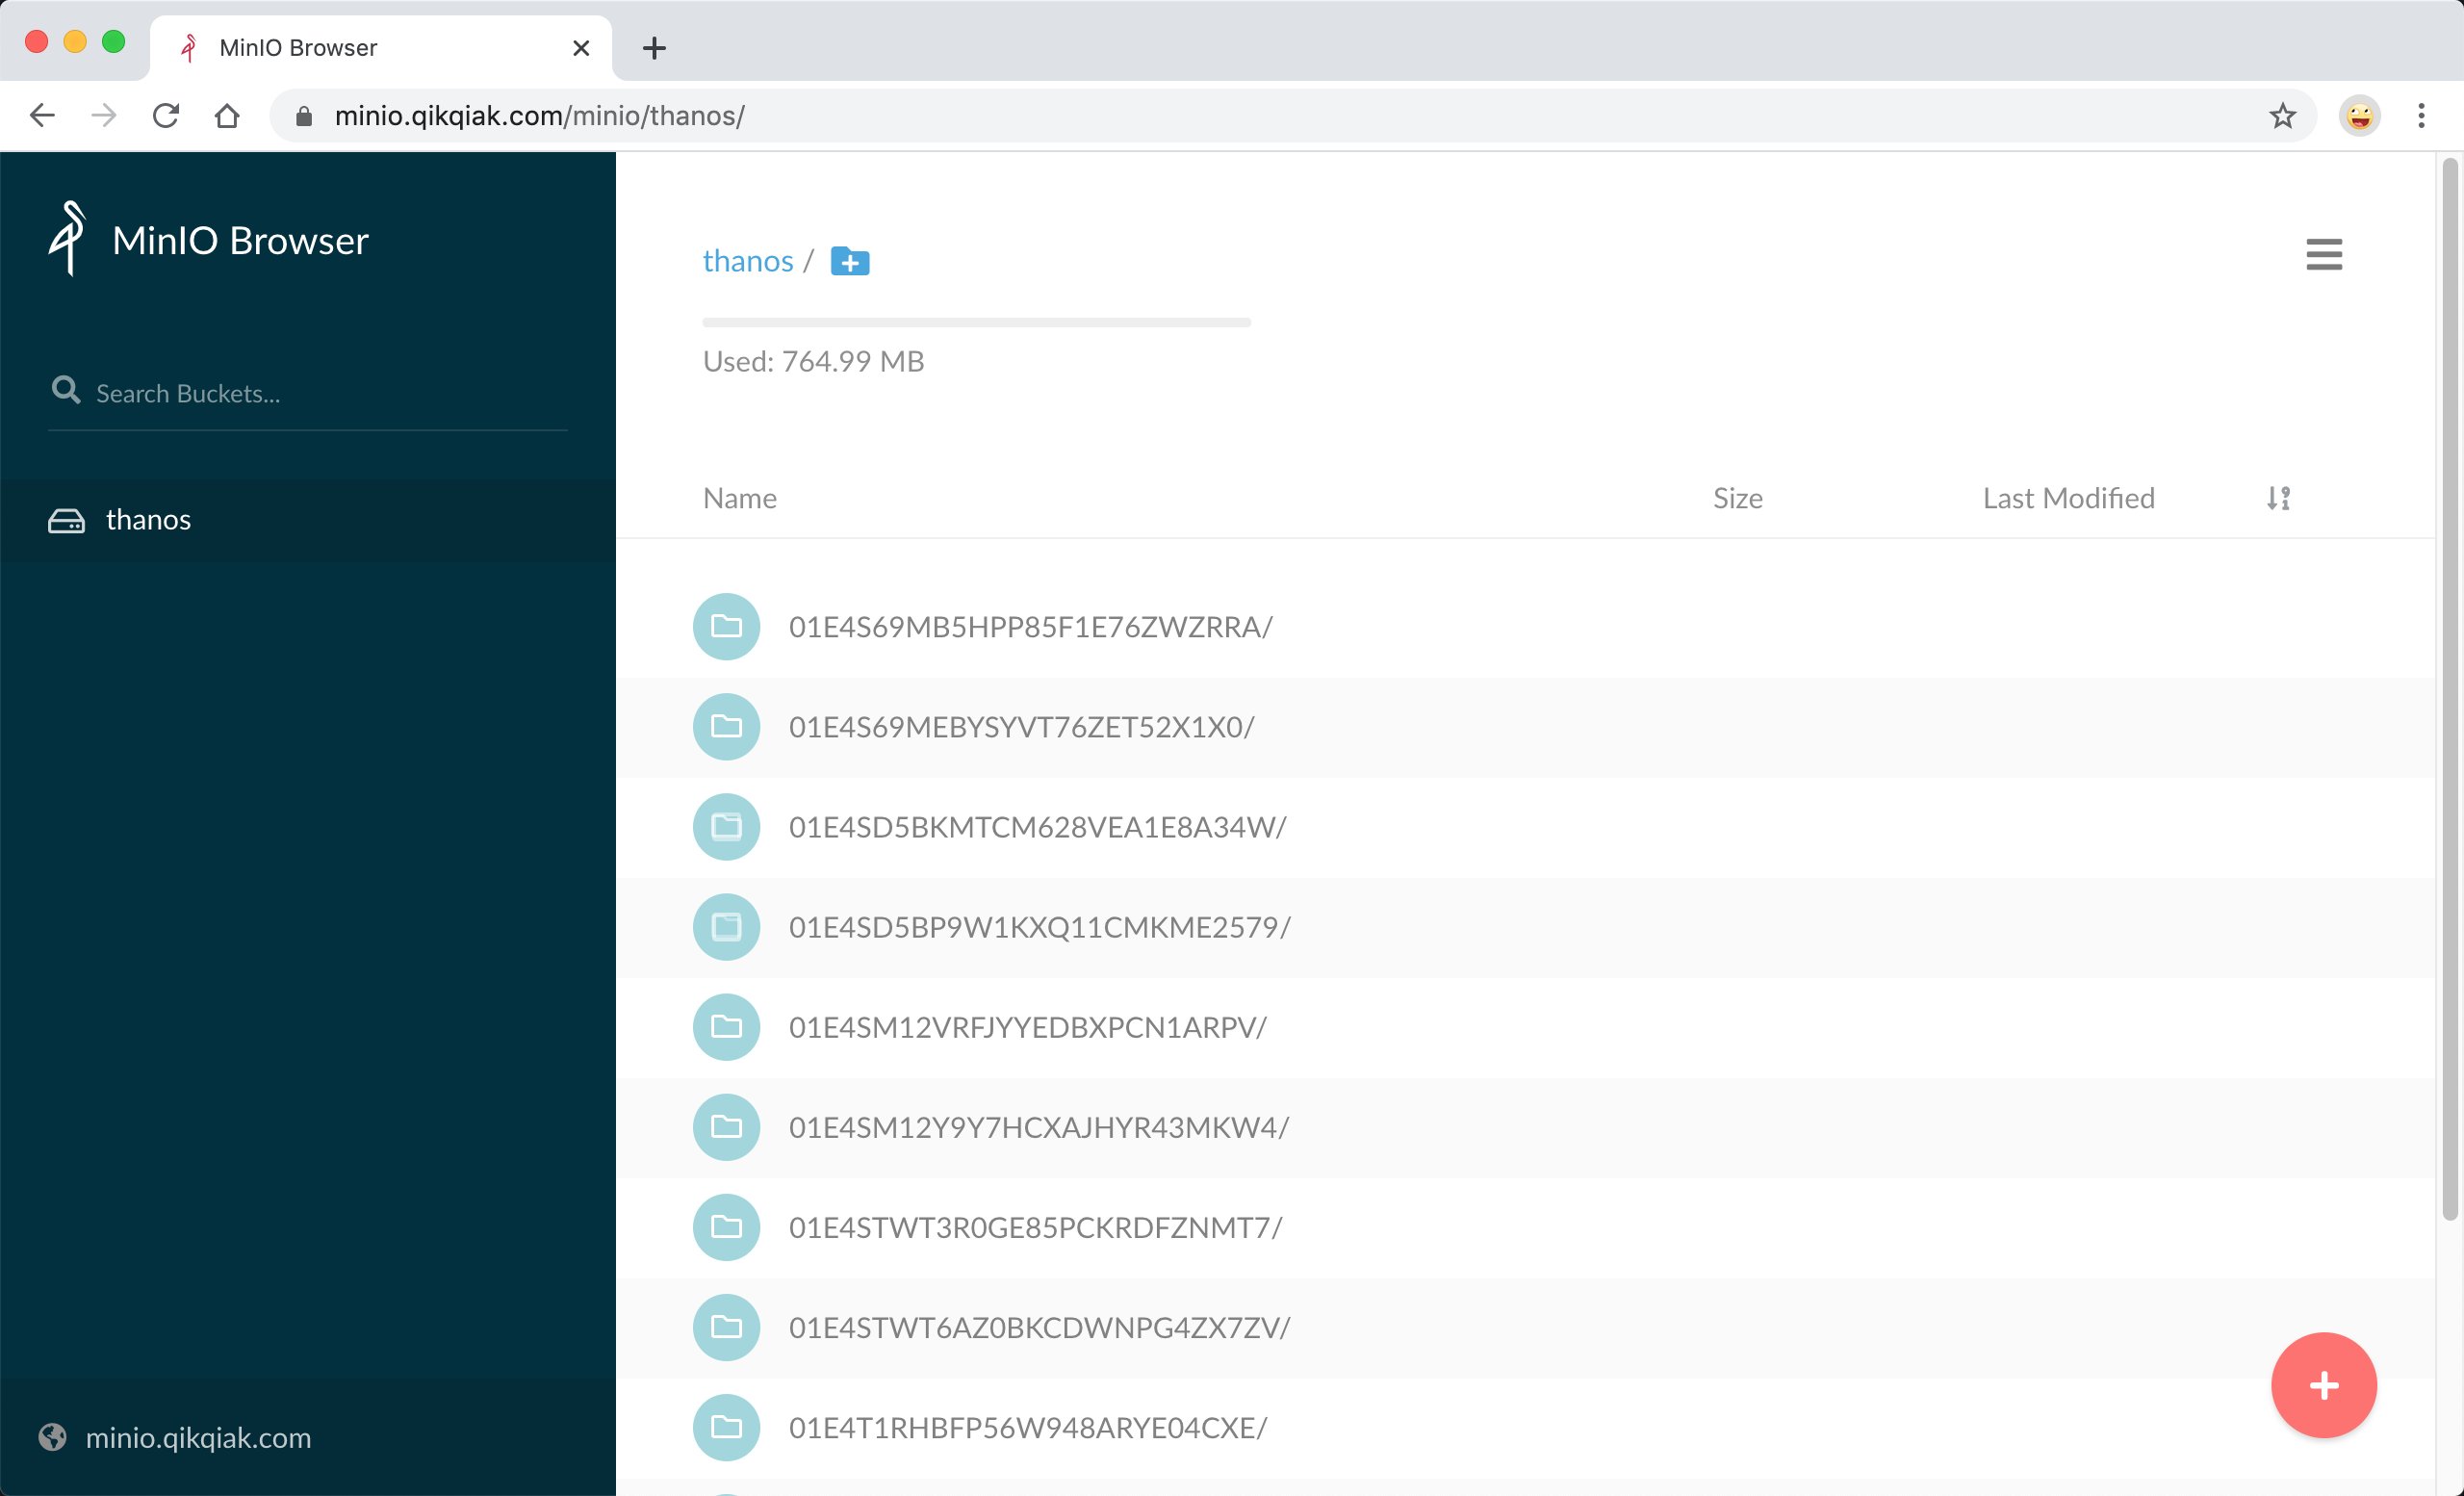
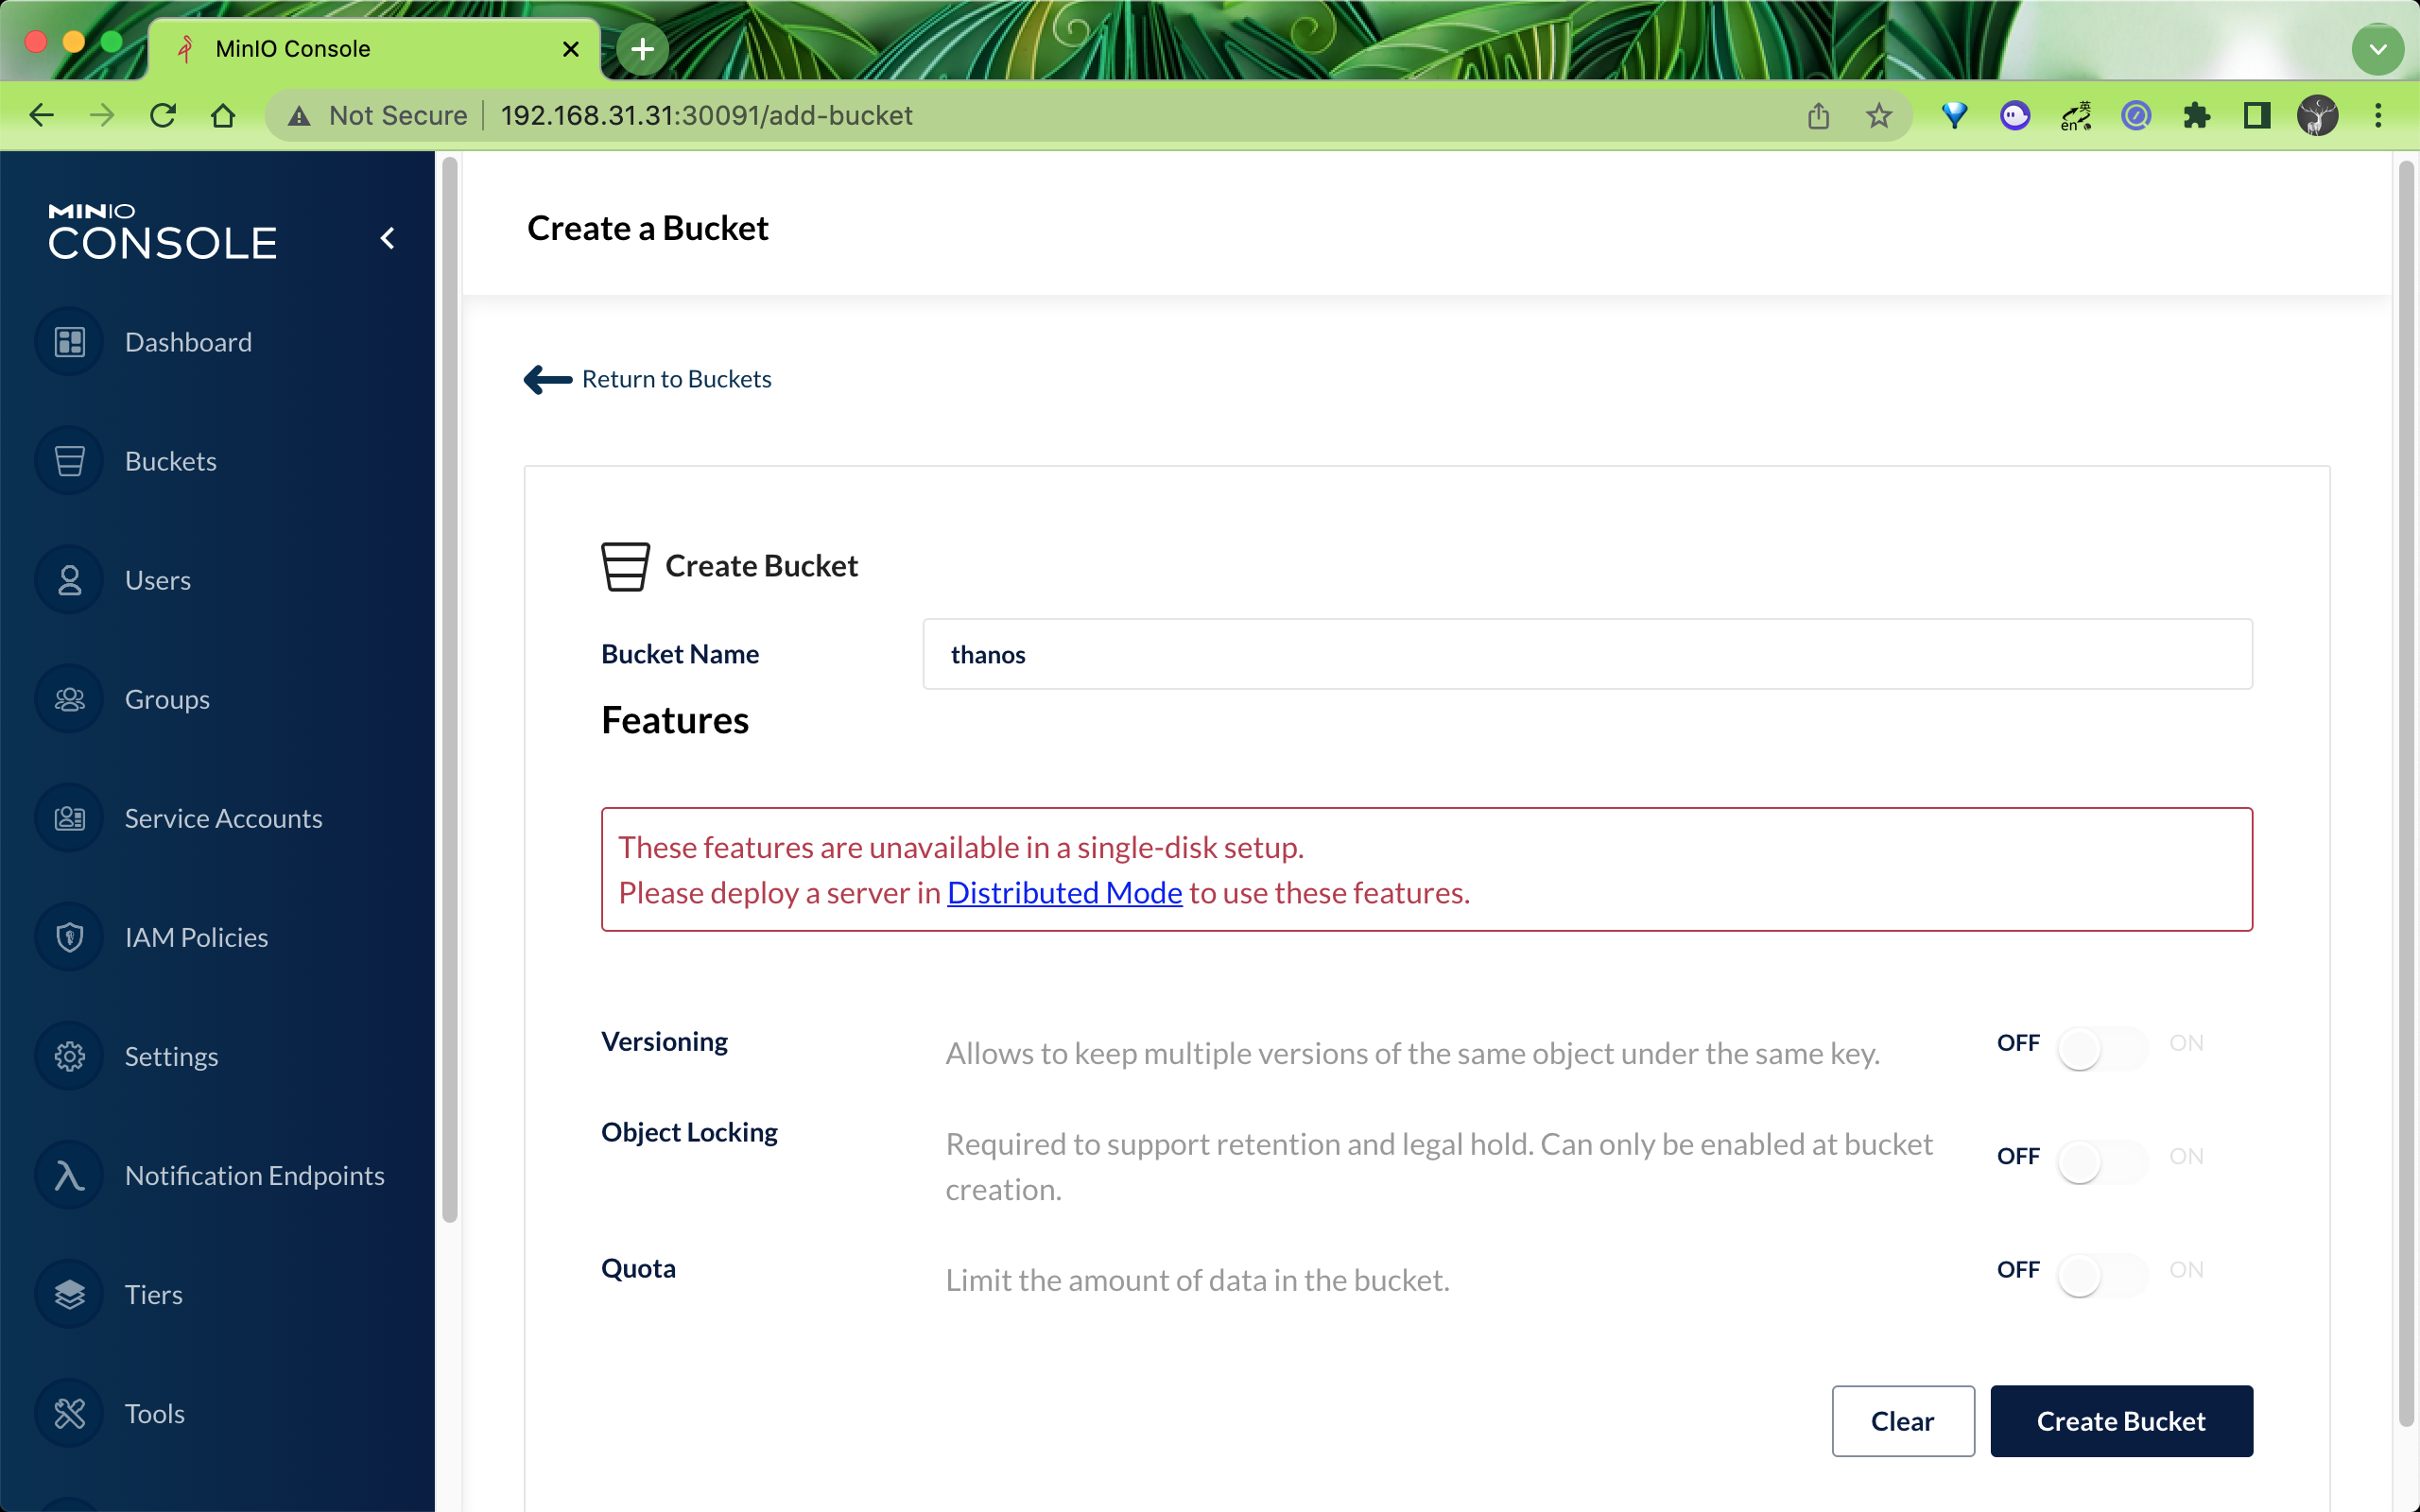
然后创建一个名为 thanos 的 bucket 桶:
安装 Thanos Store
现在对象存储准备好了,我们就可以来部署 Store 组件了,该组件会从对象存储给 Querier 提供 metrics 数据。
根据上面创建的 Minio 创建一个如下所示的对象存储配置文件:
# thanos-storage-minio.yaml
type: s3
config:
  bucket: thanos
  endpoint: minio.default.svc.cluster.local:9000
  access_key: minio
  secret_key: minio123
  insecure: true
  signature_version2: false
使用上面的配置文件来创建一个 Secret 对象:
☸ ➜ kubectl create secret generic thanos-objectstorage --from-file=thanos.yaml=thanos-storage-minio.yaml -n kube-mon
然后创建 Store 组件的资源清单文件,这里有一个需要注意的地方是需要添加一个 thanos-store-api: "true" 的标签,这样前面我们创建的 thanos-store-gateway 这个 Headless Service 就可以自动发现到这个服务,Querier 组件查询数据的时候除了可以通过 Sidecar 去获取数据也可以通过这个 Store 组件去对象存储里面获取数据了。将上面的 Secret 对象通过 Volume 形式挂载到容器中的 /etc/secret 目录下,通过 objstore.config-file 参数指定即可:
# thanos-store.yaml
apiVersion: apps/v1
kind: StatefulSet
metadata:
  name: thanos-store-gateway
  namespace: kube-mon
  labels:
    app: thanos-store-gateway
spec:
  replicas: 2
  selector:
    matchLabels:
      app: thanos-store-gateway
  serviceName: thanos-store-gateway
  template:
    metadata:
      labels:
        app: thanos-store-gateway
        thanos-store-api: 'true'
    spec:
      affinity:
        podAntiAffinity:
          preferredDuringSchedulingIgnoredDuringExecution:
            - weight: 100
              podAffinityTerm:
                topologyKey: kubernetes.io/hostname
                labelSelector:
                  matchExpressions:
                    - key: app
                      operator: In
                      values:
                        - thanos-store-gateway
      containers:
        - name: thanos
          image: thanosio/thanos:v0.25.1
          args:
            - 'store'
            - '--log.level=debug'
            - '--data-dir=/data'
            - '--objstore.config-file=/etc/secret/thanos.yaml'
            - '--index-cache-size=500MB'
            - '--chunk-pool-size=500MB'
          ports:
            - name: http
              containerPort: 10902
            - name: grpc
              containerPort: 10901
          livenessProbe:
            httpGet:
              port: 10902
              path: /-/healthy
          readinessProbe:
            httpGet:
              port: 10902
              path: /-/ready
          volumeMounts:
            - name: object-storage-config
              mountPath: /etc/secret
              readOnly: false
            - mountPath: /data
              name: data
      volumes:
        - name: object-storage-config
          secret:
            secretName: thanos-objectstorage
  volumeClaimTemplates:
    - metadata:
        name: data
      spec:
        accessModes:
          - ReadWriteOnce
        storageClassName: longhorn
        resources:
          requests:
            storage: 1Gi
Store Gateway 实际也可以做到一定程度的无状态,它会需要一点磁盘空间来对对象存储做索引以加速查询,但数据不那么重要,是可以删除的,删除后会自动去拉对象存储查数据重新建立索引,这里为了避免每次重启都重新建立索引,所以用 StatefulSet 部署 Store Gateway,挂载一个小容量的 PV。部署两个副本,可以实现 Store Gateway 的高可用。
然后直接创建上面的资源对象即可:
☸ ➜ kubectl apply -f https://p8s.io/docs/thanos/manifests/thanos-store.yaml
☸ ➜ kubectl get pods -n kube-mon -l thanos-store-api=true
NAME                     READY   STATUS    RESTARTS      AGE
prometheus-0             2/2     Running   0             20m
prometheus-1             2/2     Running   0             21m
thanos-store-gateway-0   1/1     Running   0             24m
thanos-store-gateway-1   1/1     Running   0             24m
部署成功后这个时候去 Thano 的 Querier 页面上查看 Store 信息就可以发现这里我们配置的 Store 组件了:
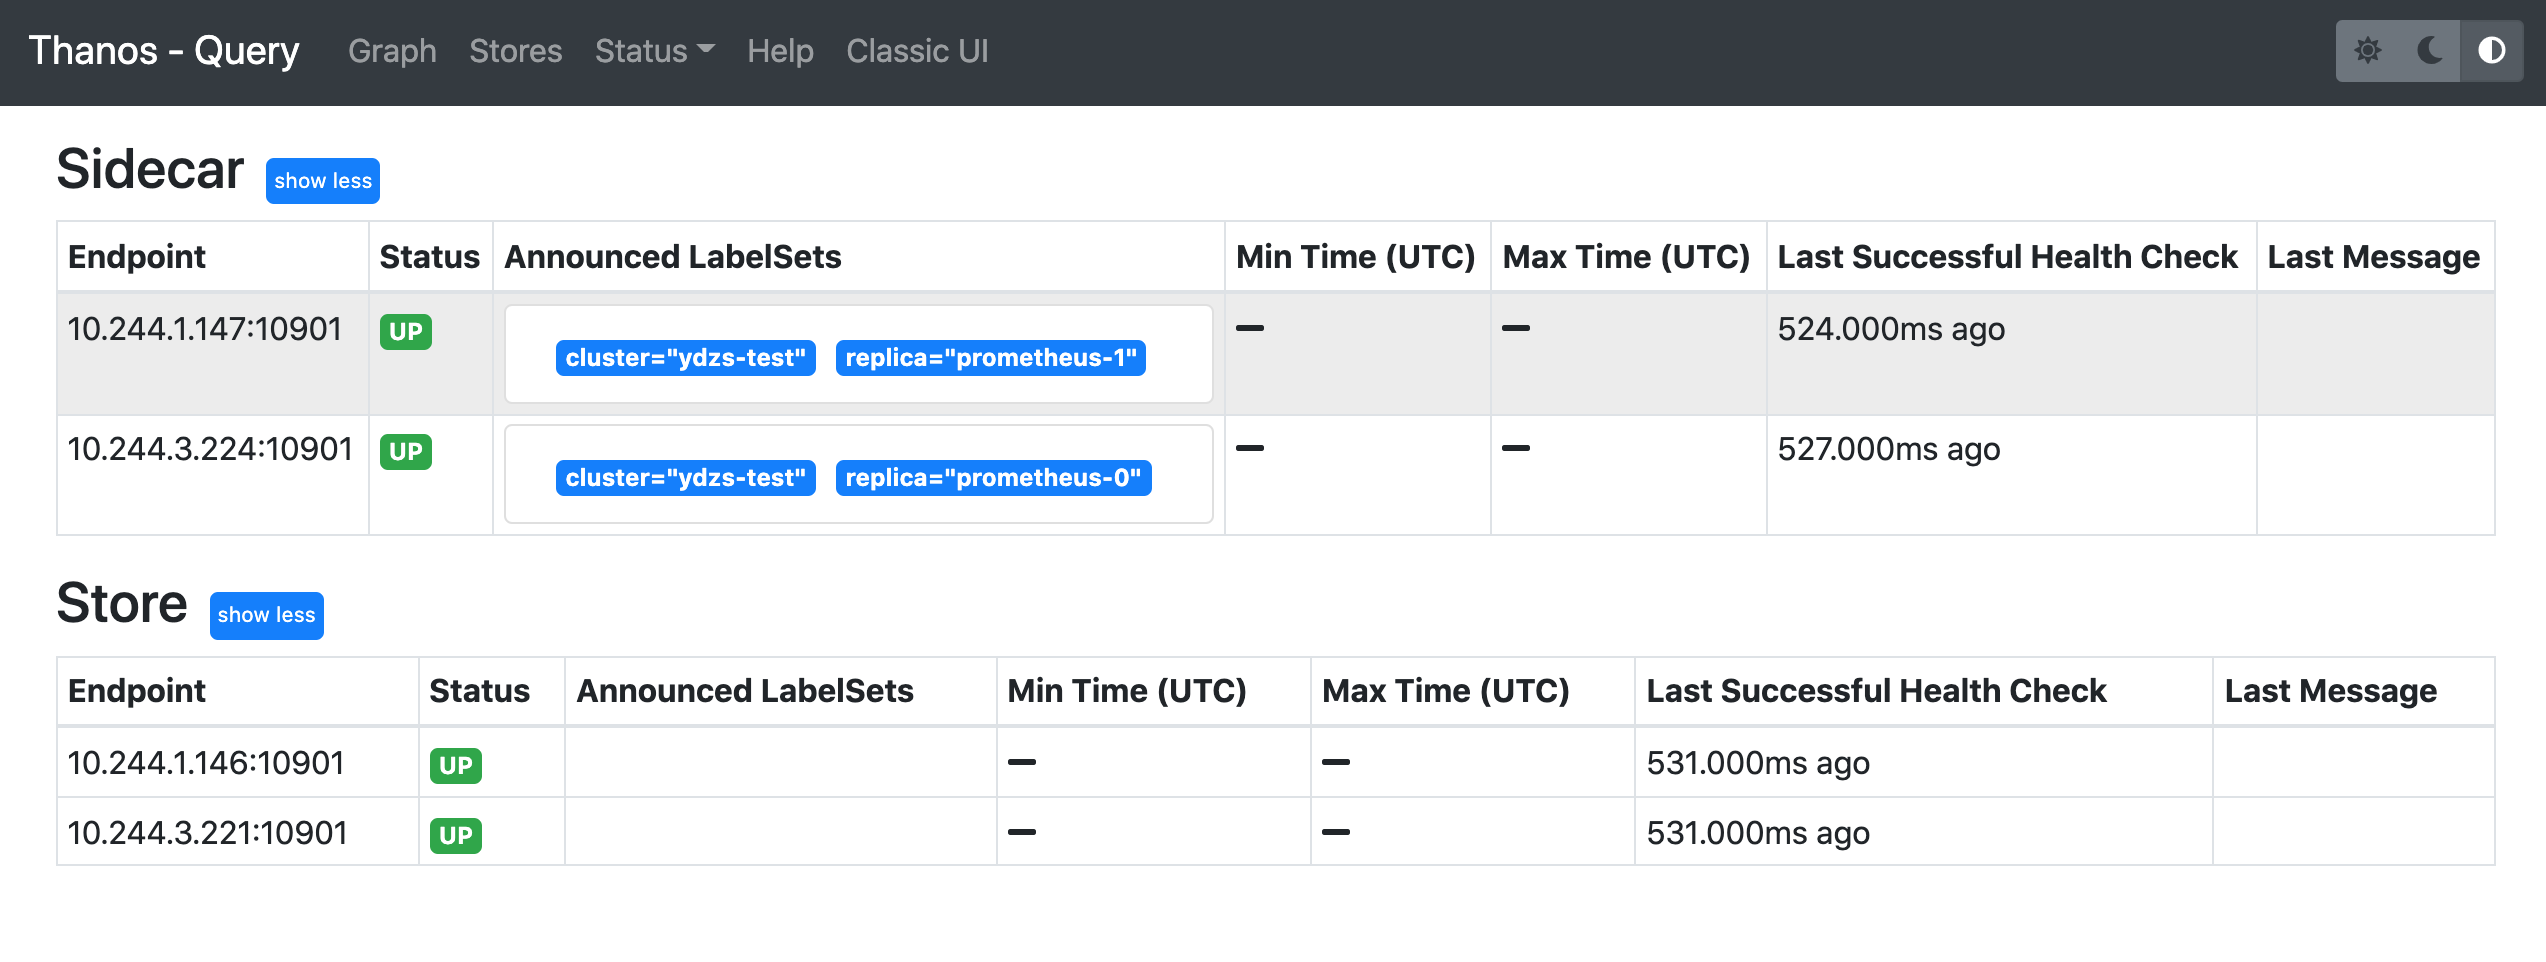
到这里证明我们的 Store 组件也配置成功了。但是还有一个明显的问题是这里我们只是配置去对象存储中查询数据的,那什么地方往对象存储中写入数据呢?当然还是在 Sidecar 组件里面了。所以同样我们需要把 objstore.config-file 参数和 Secret 对象也要配置到 Sidecar 组件中去:
......
volumes:
- name: object-storage-config
  secret:
    secretName: thanos-objectstorage
......
args:
- sidecar
- --log.level=debug
- --tsdb.path=/prometheus
- --prometheus.url=http://localhost:9090
- --reloader.config-file=/etc/prometheus/prometheus.yaml.tmpl
- --reloader.config-envsubst-file=/etc/prometheus-shared/prometheus.yaml
- --reloader.rule-dir=/etc/prometheus/rules/
- --objstore.config-file=/etc/secret/thanos.yaml
......
volumeMounts:
- name: object-storage-config
  mountPath: /etc/secret
  readOnly: false
......
配置完成后重新更新 Sidecar 组件即可,配置生效过后正常的话就会有数据传入到 MinIO 里面去了(本地有超过两小时的 TSDB 块数据),我们可以去 MinIO 的页面上查看验证: